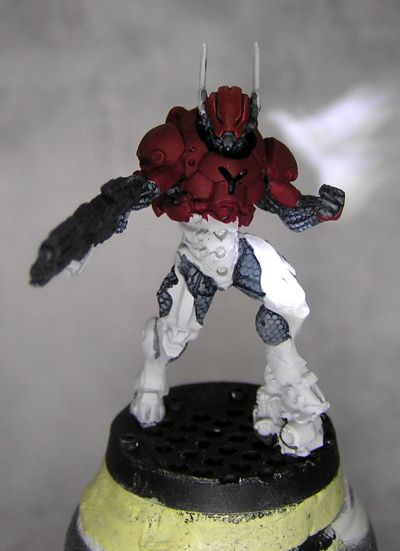
The model in question is the Mobile Brigada from the infinity starter set Operation Icestorm, one of my favorite models. This is the (heavily WiP) model as it stands now:

Step 0 is a solid basecoat of GWs Khorne Red over a white undercoat, nothing fancy here. (Ignore the helmet in all the below pics, it was a colour test I did before starting and painted over afterwards.)
Step 1 is shading. I've used GWs Drakenhof Nightshade here, but any blue wash or thinned paint should work. Using a purple to do the first shades will make the transition a bit smoother, but I wanted it done in a reasonable timeframe before I got bored. It's not applied as a wash, mind, but as a glaze, meaning that it's several thin layers applied to build up the shades. Any lines and holes get a solid amount of this to serve as semi-blacklining.
After this I thinned Khorne Red heavily and fixed the mistakes I made.
The placing of the shadows is what created the metallic shine. There's a lot of background on this written up far better than I'll be able to articulate on other sites, so I won't go into detail, but suffice to say that shadows are placed, generally, towards the upper faces of the model. This is due to the ground reflecting most of the diffused light with the upper lightsource being a smaller but brighter one, if that makes sense. Pictures should show it better, I hope.

Step 2 is the first highlight, using a 50/50 mix of Khorne Red and Evil Sunz Scarlet, also GW. I thin it a fair bit, but that goes for most of the steps here.

Step 3 is more of the same, KR and ESS, but this time in a lighter mix, about 85 or 90 % ESS.

Step 4 is where the shine starts to appear. I took the previous mix and added some Vallejo Model Color Basic Skintone (70815), in a 40% red, 60% skintone mix.

Step 5 is the finale, just adding the final highlights with white. I don't have a precise mix for this, but it's essentially white (I used Vallejo Game Color Dead White, which I like, but any will do I suspect) with a tiny, tiny drop of the previous mix in it.

And that's it. It looks a bit labourious, but after the first highlight is on, it's really only tiny amounts of paint you're applying to very small areas so it's actually relatively fast. I hope to have the finished model up soon.
No comments:
Post a Comment